Introduction to How to Enter Journal Entries in QuickBooks Online?:
QuickBooks Online is a popular accounting software for small businesses, allowing users to manage their financial records efficiently. After reading this article “How to enter journal entries in QuickBooks Online”, your problem will be resolved. Journal entries play a crucial role in bookkeeping, allowing for account adjustments and monitoring non-cash transactions. In this blog post, we’ll walk you through the steps of inputting these entries into QuickBooks Online, simplifying your bookkeeping procedures.
What is a Journal Entry?
A journal entry is a record of a business transaction in the general ledger, which includes all financial accounts for a company. It consists of debits and credits, with each side representing different accounts and amounts. The total amount of debits must equal the total amount of credits to keep the books balanced.
Consider, for instance, mistakenly logging a monthly $100 utility bill into the company’s insurance expense account. To rectify the error, an adjusting journal entry is used – crediting the insurance expense account by $100 (thereby reducing it) and debiting the utility expense account by $100 (thereby increasing it). This ensures all accounts are accurately sorted, without any need to adjust the amount payable to the vendor, given that part of the transaction was correctly documented.

Step-by-Step Guide:
Here is a Step-by-Step Guide to enter journal entries in QuickBooks Online.
To enter journal entries in QuickBooks Online, follow these simple steps:
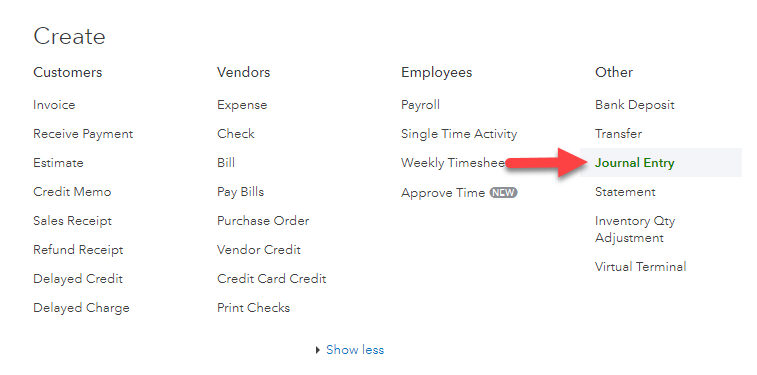
Step 1: Log into QuickBooks Online and Access the Company’s Journal Entries
After logging into your QuickBooks Online account, click on the “Accounting” tab from the left navigation menu. Next, select the “Chart of Accounts” option.
Step 2: Choose or Create a Journal Entry Account
Click the “New” button, located in the top right corner. A dropdown menu will appear. If you’ve previously set up a journal entry account, select it from the list. If not, click on “Add Account” to create a new one.
Step 3: Add Debits and Credits
Enter the date of the transaction in the designated field and add the accounts to be debited and credited. QuickBooks Online will automatically calculate the balance for each side.
Step 4: Add a Memo (Optional)
If you want to add more information about the journal entry, you can do so by adding a memo in the designated field.
Step 5: Save and Close
After reviewing all the information entered, click on the “Save and Close” button to save the journal entry.
Tips for Accurate Journal Entries:
Ensure that the total debits equal the total credits in each journal entry.
Double-check all amounts and accounts before saving the journal entry.
Use memos to provide additional information or explanation for each transaction.
Regularly review and reconcile your journal entries to maintain accurate financial records.
Conclusion:
Maintaining accurate financial records in QuickBooks Online is made simple with the utilization of journal entries. Adherence to these straightforward procedures and hints enables effortless entry of journal items, maintaining your financial ledgers in equilibrium. Recording non-cash transactions can be a breeze when you keep this guide in mind, ensuring a seamless and uncomplicated
How to Enter Journal Entries in QuickBooks Online?

Step 1: Log into QuickBooks Online and Access the Company’s Journal Entries
Step 2: Choose or Create a Journal Entry Account
Step 3: Add Debits and Credits
Step 4: Add a Memo (Optional)
Step 5: Save and Close


